~ How To Projects ~

Painted Ladybug Rocks

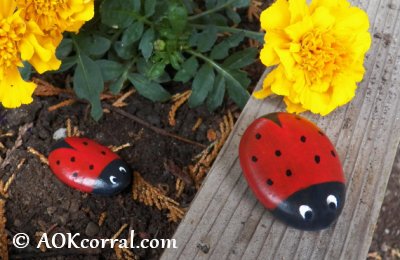
Easy ladybug painted rocks craft project for your garden or flower pots.


Go To All Projects ~ Click Here

Click below for more
Craft Projects and Patterns


~ Projects By Theme ~


AOK Corral Craft and Gift Bazaar
AOK Corral HomeCraft ProjectsFamily Activities

How To Projects ~ Easy Craft Projects ~ Painted Rock Ladybugs

Ladybug Rocks

Painted Rock Ladybugs
~
August 2013

© Copyright 2013 by AOK Corral Craft and Gift Bazaar All rights reserved.
These projects are for your personal use only and may not be republished or copied.


Materials Needed:
  • Rocks - Round & Flat in any size
  • Acrilyc Paints - Black, Red, and White (Paint should be thick and not watery)
  • Varnish or Sealer
  • Paint brushes

Paint your Ladybug Rocks:

  • Find some rocks for your ladybugs. Good rocks will be round or oval in shape with a flat bottom and a smooth surface. Make sure they are clean and dry.
  • Paint your rocks black and let them dry.
  • Paint the ladybug wings onto your rocks with red as shown in the photo. You will most likely need several coats of red paint to cover the black. Let each coat dry before adding another coat.


  • Add small black dots on the wings.
  • Paint white ovals for eyes onto the black head and let dry.
  • Finish the painting with black eye centers over the part of the white and let dry.
  • Lastly, brush the entire rock with varnish or sealer and let dry. You may want to add an additional coat for extra protection from rain and weather.


Done!
Set out your little ladybug friends in your garden or in flower pots.

© Copyright 2013 by AOK Corral Craft and Gift Bazaar.  All rights reserved.


| Home | Craft Projects & Patterns | Family Activities |
| Sitemap | Contact Us |

© Copyright 1998 - 2025 AOK Corral Craft and Gift Bazaar - All rights reserved