~ How To Projects ~
Knit Cable Pillows
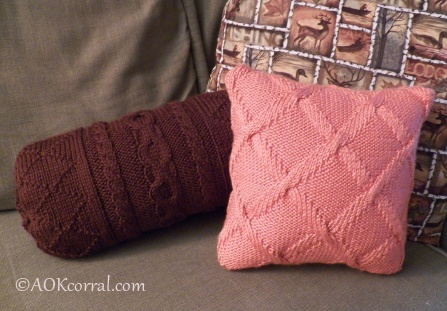
If you want to learn how to knit cables or if you are looking for some easy cable pillow patterns to knit, this project is for you. Follow the easy step by step instructions showing how to cable as you knit our easy, beginner's cable pillow.

Click below for more
Craft Projects and Patterns
|
~ Projects By Theme ~
- Animals
- Seasonal
- Holidays
Get this entire project
WITHOUT
Ads, Banners, Logo or Margins
Bonus: The Easy Print Version contains a total of 3 cable knit pillow patterns as well as the cable tutorial.
Purchase the Ad Free / Easy Print Version with bonus patterns for only $2.49

|

|
Knit Cable Pillow Patterns
Learn to Knit Cables
~
September 2007

|
-
5-6 oz. Bulky Yarn in any color. (Picture shown above was done in "Bernat Softee Chunky" Yarn)
-
US #10 Knitting Needles
|
-
Cable Needle or Spare Knitting Needle
-
12" x 12" Pillow Form
-
Five Ĺ" buttons
-
Yarn Needle
|
This project requires that you already know how to cast on, knit, purl and cast off. If you need help with any of these please see our other beginner's knitting pages.
K = Knit
P = Purl
C2B = "Cable 2 Back" - slip 2 stitches onto cable needle and hold in back of work, knit the next 2 stitches, then knit the 2 stitches from your cable needle.
C3F = "Cable 3 Front" - slip 3 stitches onto cable needle and hold in front of work, knit the next 3 stitches, then knit the 3 stitches from your cable needle.
C3B = "Cable 3 Back" - slip 3 stitches onto cable needle and hold in back of work, knit the next 3 stitches, then knit the 3 stitches from your cable needle.
- Using No. 10 needles, Cast on 54 stitches.
- Row 1: and all odd numbered rows: K6, P6, K4, P4, K4, P6, K4, P4, K4, P6, K6
- Row 2: P6, K6, P4, K4, P4, K6, P4, K4, P4, K6, P6
- Row 4: P6, K6, P4, C2B, P4, K6, P4, C2B, P4, K6, P6
- Row 6: P6, C3F, P4, K4, P4, C3F, P4, K4, P4, C3F, P6
- Row 8: Like Row 4
- Row 10: Like Row 2
- Row 12: Like Row 4
- Row 14: Like Row 2
- Row 16: P6, C3B, P4, C2B, P4, C3B, P4, C2B, P4, C3B, P6
- Row 18: Like Row 2
- Row 20: Like Row 4
1st through 20th Rows set pattern.
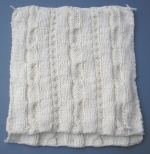
For pillow front, continue in set pattern until work measures 14 inches.
Cast off on an odd number row.
For pillow back, continue in set pattern until work measures 13 inches.
Cast off on an odd number row.
- With right sides together and top edges even, stitch a running stitch along the top edge of the pillow. Try to line up the cables on the front and back as you stitch across.

- Stitch a running stitch along each side of the pillow.
- Turn the pillow right side out.
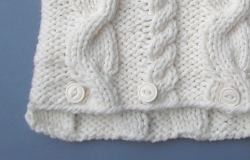
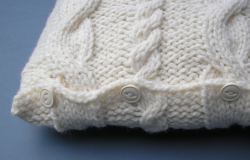
- Lay the pillow out with the back (shorter side) facing up and attach 4 to 5 buttons, evenly spaced, across the lower edge of the pillow back. (Hint: try to place your buttons next to a cable because the holes in the stitches there tend to be slightly larger and it will be easier to slide the button through a hole on the other side of the pillow in step 6.)
- Insert a pillow form into the knitted pillow.
- Pull the lower edge of the pillow front around to the back, line up the cables and button through any hole in the knit weave to close.


|
Project
Options:
|
1.) Read or Print this project from our website, as is, for free.
|
2.) Purchase Easy Print Version - Download NOW:
- Convenient - NO ads, menus, or margins - Save ink and paper
- Complete - All instructions & patterns for this project + Bonus*
*This version includes 3 cable pillow patterns and cable tutorial.
|

|
|
|
|


