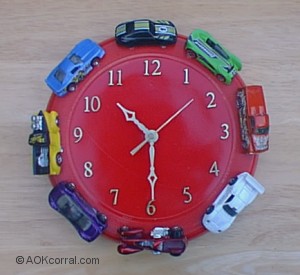
- Frisbee with a smooth center circle.
- Gloss Spray paint. (optional)
- Spray Acrylic Sealer (optional)
- Drill with 3/8 or 1/2 inch drill bit
- Ruler
- Complete Clock Kit (with built in hanger.)
- Favorite Small Toys or Toy Theme Accessories
- Glue gun with glue for light toys, Superglue for heavier toys.
|
- Use your ruler to find the center of the frisbee and drill a hole in that center with the 3/8 or 1/2 inch drill bit.
- If your frisbee has words, logos, or labels in the center that you don't want to see, spray paint the frisbee in a well ventilated area over some old newspaper. Let dry.
- Next, if you spray painted your frisbee, spray a coat of acrylic sealer over the frisbee and let dry.
- Follow the directions on your clock kit for putting the clock together using the frisbee as your clock face.
- Decide how you will arrange your selected toys or accessories on the frisbee around the clock.
- Glue each of the toys into place one at a time with the glue gun. ( Important: This clock is not for use as a toy. It is meant for display use only. If you spray painted the clock, excessive handling may cause the paint to pull away from the frisbee where the toys are attached and then the toy may fall off. )
Use bedroom colors on the frisbee and try these fun ideas; Lego mini figures, Polly Pockets, Star Wars, Winnie the Pooh, Baby blocks or Wooden Letters spelling the child's name etc... Whatever the favorite theme, this is a fun clock to do.
|
|


