~ How To Projects ~
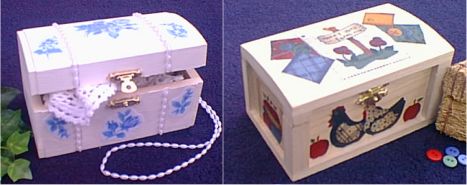
Fabric Decoupage Boxes

Click below for more
Craft Projects and Patterns
|
~ Projects By Theme ~
- Animals
- Seasonal
- Holidays
|

|
Fabric Decoupage Boxes
~
june 2002
|
- Wooden boxes, any size
- Printed fabrics - cotton or other thin fabrics are best.
- Acrylic paint
- Paintbrushes
- Decoupage clear coat medium or Elmer's glue and Clear coat varnish.
- Scissors
- Accessories like buttons, flowers, ribbon, lace, pearls, etc... (optional)
|
- Paint your wooden box in the color of your choice or leave it natural if desired. Let dry.
- Cut out designs from the fabric of your choice.
- Decide where you want to place each cut out piece.
- Then carefully attach the fabric pieces onto the box with a little elmer's glue.
- With a paint brush, completely cover each fabric piece with decoupage clear coat or elmer's glue. (Make sure to saturate the fabric with medium/glue and brush it completely over the edges of the fabric and onto the wooden box.)
- Let dry completely.
- If you used decoupage clear coat medium, you can brush over the whole box again to give the whole box a varnish seal. If you used elmer's glue to decoupage the fabric, Brush on a light coat of varnish over the whole box to seal it.
- Then glue on any special accessories like ribbon, buttons, pearls, etc..
|
|
|


