|
Plastic Canvas Coaster Patterns
~
April 2008
|
|
You may print this page as is or...
Easy Print Option:
Includes all patterns and instructions for this entire project without margins, ads or logos.
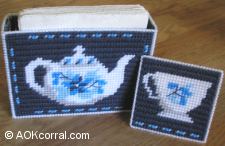
Bonus: The PDF Version contains the additional coaster design shown.
|
|

|
|
- Plastic canvas sheets in 7 count mesh. (You will need 1 sheet for the holder and 1 sheet for every 6, single sided coasters or for every 3, double sided coasters or purchase pre-cut 4" squares for the coasters.)
- Needlepoint Needle
- Sewing Scissors
- Regular, Acrylic, 4 ply yarn
|
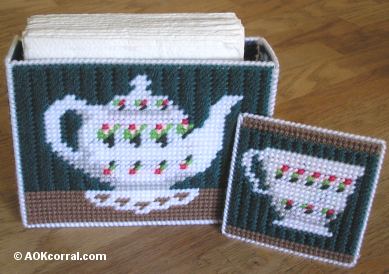
Coasters: Purchase pre-cut 4" squares of 7 count plastic canvas or cut your own from 7 count plastic canvas sheets. Your squares should measure 27 square holes x 27 square holes.
Coaster Holder / Napkin Holder: Cut the following pieces from sheets of 7 count plastic canvas.
Cut 2 for Front and Back: 48 holes x 35 holes.
Cut 2 for Sides: 13 holes x 35 holes.
Cut 1 for Bottom: 13 holes x 48 holes.
- Real Teal - Contrasting Background Color
- Café Brown - 2nd contrasting background color/table color
- Shocking Pink - Dark shade of Color for Rose
- Lily Pink - Light shade of Color for Rose
- Dark Sage - Dark shade of Color for Leaf
- Spring Green - Light shade of Color for Leaf
- White - Main color for Tea pot
- Light Grey - Slightly darker shade than teapot main color to be used for teapot shadows
Stitch all your pieces according to the patterns given. To stitch the bottom for the coaster holder / napkin holder, stitch the piece in the same color as your background color and with the same horizontal or vertical lines as on the other pieces in the pattern of your choice.
(You may choose to make your coasters single sided or double sided. To make your coasters double sided, stitch two square pieces for each coaster. Place the finished squares with wrong sides together and stitch them together with the finishing as instructed here.)
- Using the color of yarn you want for the edges begin by securing the end of yarn under several stitches on the back of the coaster near the edge where you will begin.
- From the back, send your needle through one of the holes on the edge. (For double sided coasters, send your needle through one hole from each side that line up across from each other.)
- Bring your needle over the edge, around to the back again (or for double sided, to the other side) and then send your needle through the next hole.
- Continue doing this all around the edges of the coaster and secure the end of the yarn under several stitches in the back (or for double sided, on the inside along the edge). This will form a nice finished yarn edge.
- Using the yarn color of your choice, join the pieces as follows:
- Line up the holes of each piece that you are joining. Secure the end of the yarn by sliding it under several stitches on the back of one of your pieces near the corner where you wish to begin.
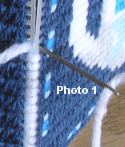
- Start at one corner hole and bring your needle through from the wrong side.
- Next, go through the adjacent hole in the other piece from the right side through to the wrong side. (see photo 1)
- Continue joining the piece by looping through each pair of holes in this manner.
- Join the sides of the holder to the front piece and then stitch the back onto the other side edges.
- Then, stitch the bottom of the holder on by stitching all the way around the connected front, back and sides.
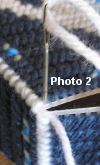
- At each corner, send your yarn through the corner square in the bottom twice. Once to match up to the square in the corner of the side piece and again to match up with the corner in the front/back pieces. (see photo 2)
- Finish the holder by stitching around the top edge in the same way that you finished the edges of the coasters.
|
|
Do you like this project? Would you like to see more like it?
What kinds of projects to you like?
Please Tell Us
If you enjoy these free projects, please support our website by shopping our Craft Bazaar
or by purchasing the AD Free/Easy Print PDF Version above.
To View other Projects go to Project Library Page
|


