~ How To Projects ~
Snow Globes

Click below for more
Craft Projects and Patterns
|
~ Projects By Theme ~
- Animals
- Seasonal
- Holidays
|

|
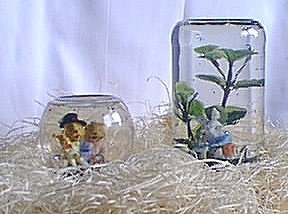
Snow Globes
~
May 2000
|
- Jars
- Figurines
- Wood Pieces or Stones
- Tarnish-Resistant Glitter (Use white for snow, blue for rain, or mixed for party confetti.)
- Epoxy
- Coarse Sandpaper
- Metal Primer & Oil-Based Enamel Paint (optional)
- Distilled Water
- Glycerin
|
*Glycerin is available at drug stores, either around the pharmacy or in the cosmology area.
- You can use any jar you like with a screw-on lid. Baby-food, pimiento, olive, and jelly jars are good. If the jar lids have any printing on them or you just want to change the color, prime the lid with metal primer and paint them with oil-based enamel paint. Sometimes lids will look fine left as they are or you can glue some ribbon around the outside of the lid rim.
- Before gluing your figurines in place, arrange them in the jar you are planning to use, making sure that the sizes work.
- Sand the inside of the lid with coarse sandpaper until the surface is rough. This will help the epoxy (waterproof glue) adhere to it.
- Using epoxy, glue the figurines to the inside of the lid, and let the epoxy dry according to its instructions. You may need to raise the figurines a little bit so they can be seen clearly. To do this, you can first glue in a small piece of wood or a flat stone, then the figurines. (Use a little sandpaper to roughen the stone or wood's surface before gluing.)
- Fill the jar almost to the top with distilled water.
- Add a pinch of non-tarnish glitter and a capful of glycerin to keep the glitter from falling too quickly. But don't add too much glycerin or the glitter will stick to the bottom of the jar when it is turned over.
- Add just a little more distilled water so that it is almost overflowing and carefully screw the lid tightly closed.
|
|
|


