~ How To Projects ~
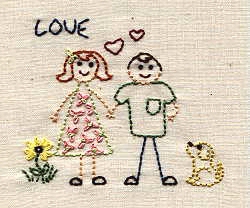
Sweethearts Embroidery
Stitch this sweetheart couple hand embroidery design and make a heart shaped frame to go with it.

Click below for more
Craft Projects and Patterns
|
~ Projects By Theme ~
- Animals
- Seasonal
- Holidays
|

|
Sweethearts Embroidery Design & Frame
~
February 2000
|
- Sweetheart Pattern
- Muslin or Other Fabric
- Embroidery Hoop
- Needle & Scissors
- Transfer Pencil
- Pattern - Click here
- Iron
- Floss:
- 221 - Mouths, hearts
- 301 - Girl's hair
- 610 - Boy's hair
- 676 - Dog
- 727 - Flower petals
- 772 - Girl's dress, hair ribbon, dress flower centers
- 776 - Girl's dress flowers
- 930 - Boy's pants, love
- 945 - Faces, arms, girls legs
- 3363 - Boy's shirt, grass
- 3371 - All eyes, dog's nose, flower center
|
This pattern uses the following embroidery stitches: Backstitch, Lazy Daisy, French Knot, and Satin Stitch. If you don't know how to do any of these stitches Click Here for an instruction page.
- To transfer design pattern use one of the following methods: Hot iron transfer pencil or Dressmaker's carbon paper
- Use double thickness of muslin and other light fabrics.
- Secure fabric in a wood embroidery hoop.
- Stitch using three strands of floss.
- Three different stitches are used in this design: Backstitch, Lazy Daisy, French Knot, and Satin Stitch.
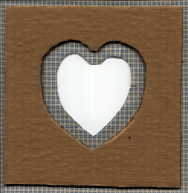
- When finished, prepare the picture to fit in the frame by centering the picture over a piece of thin cardboard 5" x 5 1/2". Fold the edges over the cardboard tightly, one at a time, and glue in place.
- Cardboard, 1/8" thickness - Use for Frame Pattern
- Scissors or knife
- Glue gun
- Fabric
- Polyester filling
- Ribbon 8 to 12 inches long
- Accessories
|
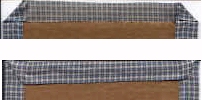
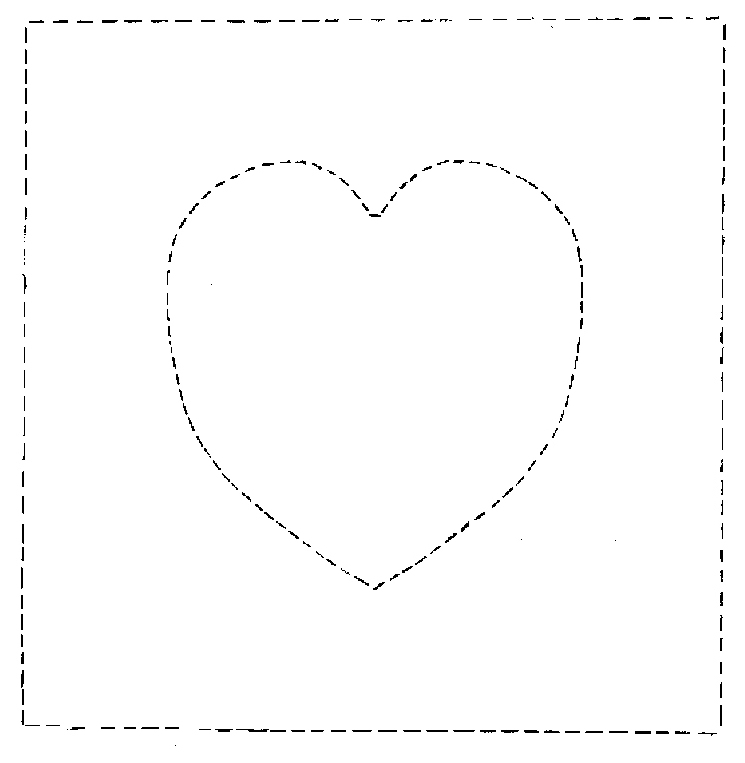
- Cut 2 pieces of cardboard according to the frame pattern, 7" x 7 1/8"
- For the front piece, draw the heart from the pattern onto the cardboard, and cut it out
- Using the frame pattern, cut out two pieces of fabric:
- For the front, extend all the edges of the pattern 1 1/4" and cut.
- For the back, extend all the edges of the pattern 1/2" and cut.
- Lay the smaller piece of fabric out, wrong side up.
- Center the back piece of cardboard onto the fabric square.
- Fold the 1/2" fabric allowance over the cardboard edge of one side and glue.
- Do the same to the opposite edge and be sure to pull the fabric a little to make it tight.
- For the top and bottom edges, turn in the corners as shown and glue, then fold over and glue.
- Lay the larger piece of fabric out, wrong side up.
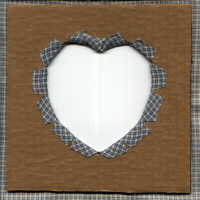
- Center the front piece of cardboard onto the fabric square.
- Inside the cut-out heart shape, draw a line 1/2" from the edge and cut along the line.
- Make cuts in the fabric at points and corners up to 1/8" from the cardboard edge. (approx every inch)
- Fold each separate segment of fabric over the cardboard and glue. (Start at the bottom point and work evenly with both sides at the same time.)
- Turn the front piece over.
- Starting with the bottom of the frame, put a small amount of polyester filling between the fabric and the cardboard.
- Fold the fabric edge over the cardboard tightly and glue.
- Do the top the same way.
- Before doing the sides, fold in the corners as you did previously for the back, glue.
- Now finish each side by evenly distributing filling and folding the fabric over the cardboard, hold tight and glue.
- Take frame back and turn it wrong side up.
- Glue the ends of the ribbon to the top corners of the frame back. (these ends will become hidden with next step)
- Run a generous line of glue around the two sides and bottom of the frame back.
- Place the frame front onto the frame back, wrong sides together, and apply pressure. (Be careful that all the edges line up before gluing the pieces together.)
- Add Accessories to the frame.
|
|
|


